Planet Zoo 2 Blueprints Guide: Ready-to-Place vs Piece-by-Piece
Planet Zoo 2 blueprints let you place pre-built designs instantly, or build piece by piece with scaling, flexi-colour and pathing tools. Here is when to use each.
Planet Zoo 2 gives you two confirmed ways to build: ready-to-place blueprints that drop complete designs into your zoo, and piece-by-piece construction that hands you every individual wall, path and plant. Neither is the “correct” way to play. Each solves a different problem, and the best zoos use both.
What Are Blueprints?
Blueprints are pre-assembled pieces of zoo — habitats, shops, scenery arrangements, even whole habitat-plus-viewing complexes — that you place into your park as a single unit. Frontier has confirmed that Planet Zoo 2 ships with a range of ready-to-place blueprints spanning its scenery themes, so a blueprint is never just functional; it arrives dressed in a coherent architectural style.
The value is speed and reliability. A blueprint habitat is guaranteed to be buildable, reachable by staff and presentable to guests from the moment it lands. For new players, blueprints are a safety net that keeps early zoos functional while the learning curve is steepest. For veterans, they are time-savers that convert repetitive work into seconds.
Piece-by-Piece: Total Control
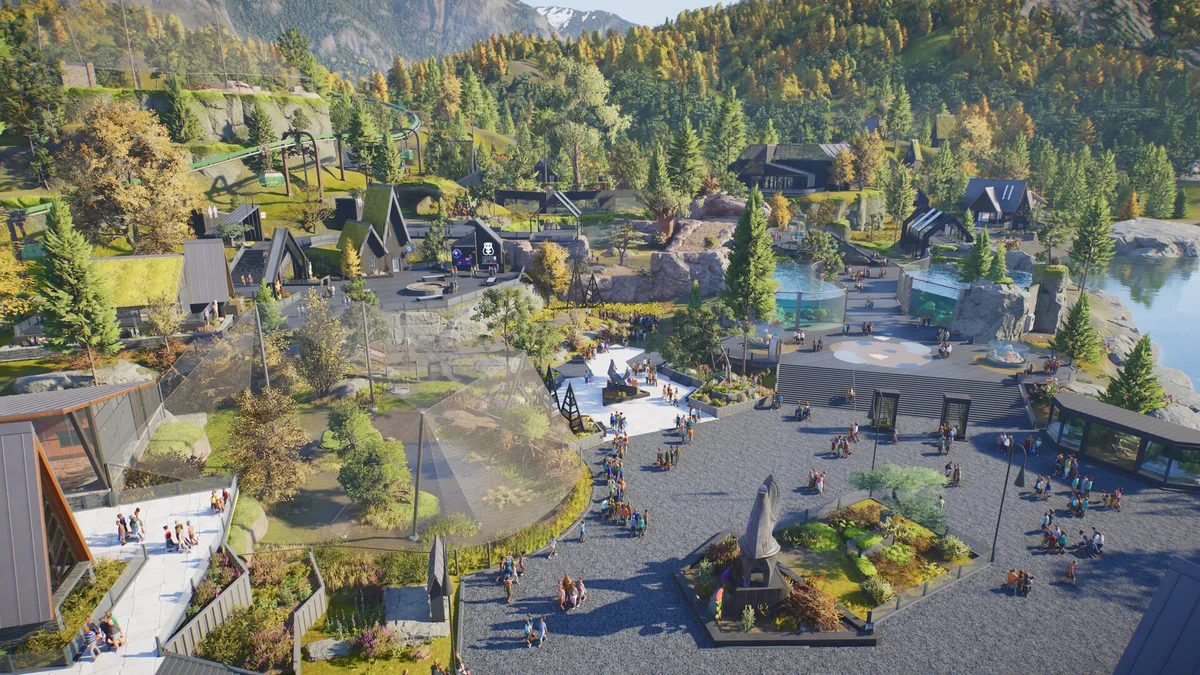
Piece-by-piece construction is the Planet franchise’s iconic building method, and Frontier has confirmed its return in full. Every wall, fence, path segment, plant and prop is placed by hand. Nothing arrives pre-decided.
This approach trades speed for control. When you build piece by piece, you decide the exact footprint of a habitat so it hugs the terrain you have sculpted. You decide sightlines — where guests stand, what they see first, how the enclosure frames the animal. You decide the visual rhythm of a district: roofline heights, colour accents, planting density. Piece-by-piece is slower, and that slowness is the point. It is where personal style lives.
Piece-by-piece building is also where Planet Zoo 2’s confirmed scaling system earns its keep. Every prop and structure can be resized to the composition you are imagining, so a design that would once have required clipping and workarounds now assembles cleanly. Scale a fence panel to close a gap exactly, enlarge a centrepiece fountain to anchor a plaza, shrink a lamp post to sit politely beside a bench.
The two approaches are not mutually exclusive. A common veteran workflow is to place a blueprint as a structural skeleton — a proven habitat layout — then rebuild its edges piece by piece so it merges with the surrounding terrain and scenery.
The Confirmed Toolset: Scaling, Flexi-Colour and Pathing
Three tool systems confirmed for Planet Zoo 2 make both approaches dramatically more flexible than they were in the original game.
Scaling lets you resize scenery pieces and structures to fit the space you actually have, rather than forcing your design around fixed asset dimensions. A single arch can span a narrow path or a grand entrance. Flexi-colour lets you repaint pieces across your zoo so a blueprint placed in three different biomes can still read as one coherent park identity. Together they mean fewer compromises: the piece you want can usually be made the size and colour you need. These tools flatten the old gap between blueprint convenience and custom control — a placed blueprint is now a starting point you edit, not a finished object you tolerate.
Pathing is the third pillar. Frontier describes an easy-to-use pathing system, and path quality is a hidden driver of guest happiness — guests walk where paths invite them, linger where paths widen, and complain where routes dead-end. Wide main avenues carry crowds to your flagship exhibits; narrow side paths reward the curious with quiet viewpoints. Plan path networks early, before buildings lock them in. Our habitat design guide covers how paths and viewing areas interact with animal welfare.
When to Use Which Approach
Use ready-to-place blueprints when speed, reliability or budget discipline matters: the opening hours of a Franchise zoo where every coin counts, the functional back-of-house buildings guests never scrutinise, or any moment you would rather spend designing exhibits than assembling gift shops.
Use piece-by-piece when identity matters: the entrance plaza that sets your zoo’s tone, signature habitats for flagship animals, and anywhere the terrain is awkward enough that a generic footprint would fight it. Sandbox mode is where piece-by-piece shines brightest — with unlimited funds, construction time is the only cost. Our Sandbox mode guide covers that creative freedom in detail.
Use both together everywhere else. Blueprints for volume, piece-by-piece for character, and scaling plus flexi-colour to stitch them into one vision. Our scenery themes guide explains the architectural palettes you will be working with, and the beginner guide walks through your first build from empty map to open gates.
Blueprint Strategy in Career and Franchise
In the modes that keep score, blueprints are an economic tool first and an aesthetic one second. A blueprint habitat placed early generates welfare, guest happiness and income while your hand-built centrepieces are still under construction. Think of blueprints as your zoo’s scaffolding: they let you open quickly, earn quickly, and replace gradually.
Replacing gradually is the key. Swap blueprint buildings for custom work one district at a time, when the budget allows, rather than demolishing half the zoo in a redesign spree your accountants will regret. Keep the blueprint somewhere — a staff area, a back-of-house corner — where function matters more than form, and it will keep earning its place for years.
Common Blueprint Mistakes
Two mistakes are worth avoiding. First, placing blueprints without checking fit: a design built for flat ground will fight a slope, so level the site or adjust with the terrain brush before you commit. Second, theme clash: a blueprint from one scenery theme dropped into a district built in another reads as an error, not variety — flexi-colour fixes most of this, but placement discipline fixes it better.
Build smart, not slow — and let blueprints do the boring work so your creativity goes where guests will actually notice it.
Related Articles
building
Planet Zoo 2 Habitat Design Guide: Welfare, Terrain and Foliage
Design better habitats in Planet Zoo 2 with this guide to terrain and foliage brushes, water, real animal behaviour and the four pillars of animal welfare.
building
Planet Zoo 2 Scenery Themes: 4 New Themes and 5 Returning
Planet Zoo 2 confirms four new scenery themes and five returning from Planet Zoo, with iconic architecture across globe-spanning biomes. Here is what each offers.
game-modes
Planet Zoo 2 Sandbox Mode: Unlimited Creativity, Zero Pressure
Planet Zoo 2 Sandbox mode removes money limits so you can enjoy unlimited creativity. Learn how blueprints, scenery themes and tools work without pressure.
Was this helpful?
Thanks for the feedback!